Connecting to AirComfort using Cured Meat App
Download App by scanning this QR code

Or for Android users click here, for iOS users click here.
Open Wireless communication in your phone.
Turn on Location and Bluetooth.
Launch the CuredMeat App.
.png)
Login using your ibebot Dashboard+ credentials (AirComfort Cloud Storage).
.png)
If you don’t have Dashboard+ account yet click Register button in the App or you can register on this link.
Click the Add (+) button.
.png)
Click the AirComfort.
.png)
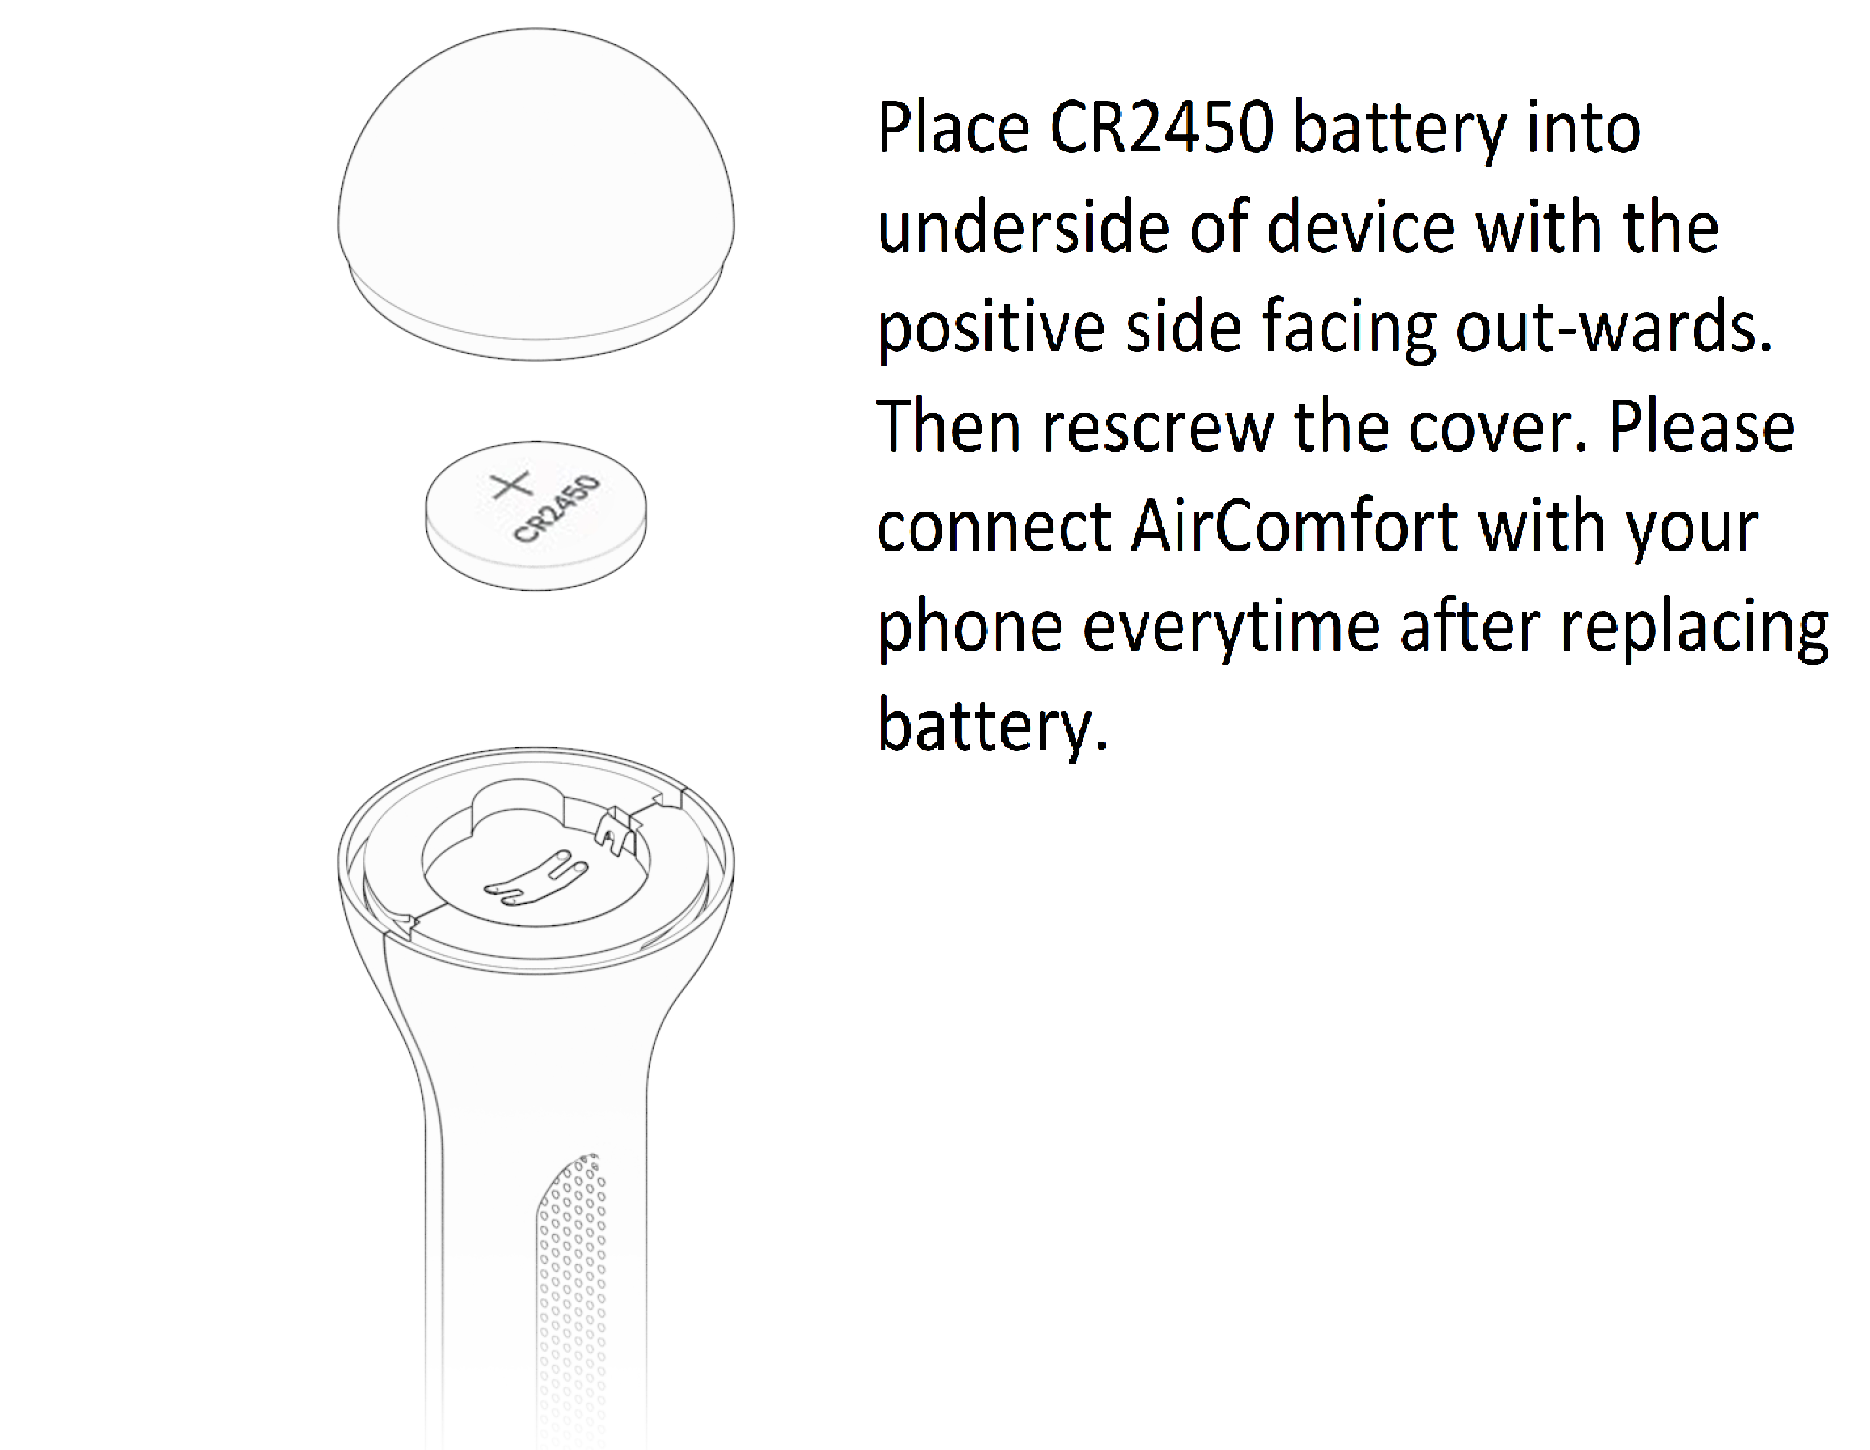
Please follow the correct inserting of battery of the AirComfort device as seen in the picture. Then click the Next button.
.png)
Wait for the device to be detected then click Next button.
.png)
.png)
Input your desired sensor name then click the Save button
.png)
Click the Start button. Wait a few minutes for the sensor to sync data completely.
.png)
If your device is brand new, you might not yet see a graph as no records has been captured yet. You can refresh again the sensor a few hours later to sync and see graph showing.
.png)